
Digitising physical photos and ephemera using a smartphone
If you have physical copies of photos or ephemera such as flyers and ticket stubs, you can digitise them at home using a smartphone camera. You can also use this guide if you are using a digital camera.
Get ready
You’ll need:
- A camera (look for 10 megapixels [MP] or more: the back camera on most smartphones will suffice).
- A surface with a plain or single-colour background (e.g. an empty desk or kitchen table).
- Simple photo-editing software (the photo editor on your phone will be adequate).
Take your photos
- Set up your photographing area indoors with natural light, but away from harsh glares or sunlight.
- If your device enables you to adjust the resolution of photos, make sure your camera is set to the highest resolution.
- Make sure the flash is switched off.
- Always use the back camera, not the front.
- Find the right angle – don’t cut anything out of the photograph.
Tip: Use an app such as Google PhotoScan to help you to produce level, glare-free photos.
Check the quality
Once you have finished, check through each photo for the following:
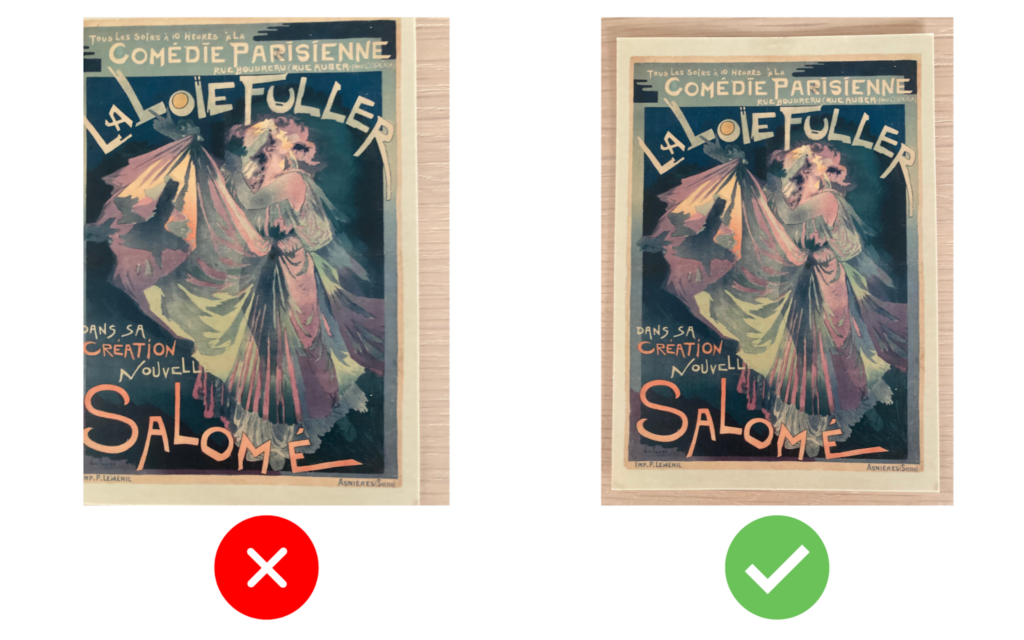
Framing
All parts of the object should be visible: don’t cut off any edges or corners.
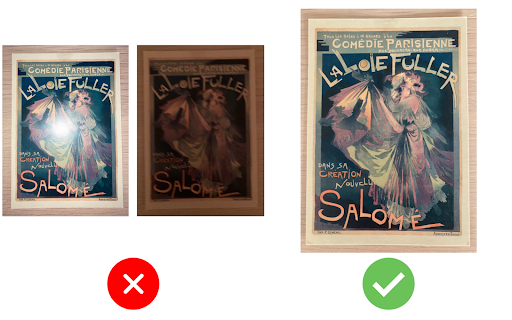
Lighting
The photo should not be under exposed (too dark) or over exposed (too light).
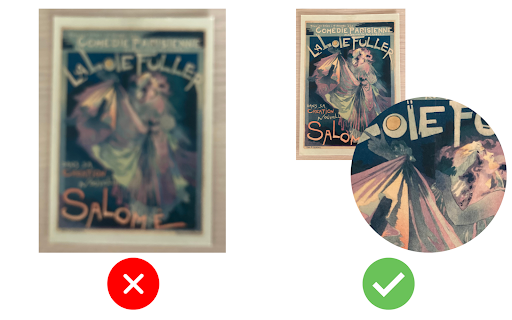
Clarity
The photo should not be blurry, even when zoomed all the way in.
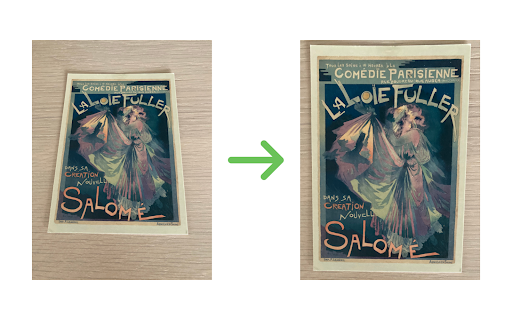
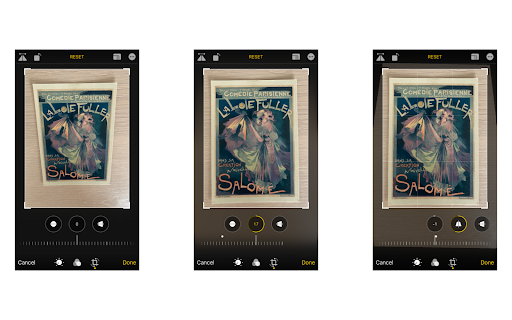
Edit your images
Once you have quality-checked your photos, you may wish to straighten them or crop out any excessive background. Most smartphones include software to perform these kinds of simple editing functions. For example, see Apple’s guide to editing photos on an iPhone. You can also edit your photos using a service like Google Photos (see this guide).
Further resources
Book Bunk, How to Build A Personal Archive (2021)
PC Mag, How to Scan Old Photos With Your Phone
Smithsonian Institution Archives, Recommended Preservation Formats for Electronic Records
Bentley Historical Library (University of Michigan), File Formats