Digitising text-based documents with a smartphone scanner
If you have physical copies of handwritten documents, letters, or any other sort of text-based document, you can digitise them at home using a smartphone camera.
Get Ready
You will need:
- A smartphone with a working back camera.
- A stable surface with a plain, uniform colour to act as a backdrop (e.g. an empty desk). Try to avoid tablecloths with patterns.
- A scanning software application. Adobe Scan (used in this guide) is available for free use on both the Apple and Play Store. There are many other apps that do the same job – pick one that is right for you.
Setting up
- Set up the area you will be taking your photos in by clearing a space of clutter. Indoors, with plenty of natural light, is ideal. Avoid harsh glares or uneven streaks of sunlight across the document you are planning to scan. If the surface of the page is glossy, or if you and your phone are casting a shadow, it may help to reduce the light from above and add lighting from the sides.
- Make sure the flash is switched off on your device.
- Set the camera to the highest resolution it offers you.
- Hold the phone directly over the document (not at an angle) and make sure the page you are scanning fills your screen. Holding the camera further away and zooming in to take the photograph can have a negative effect on the quality of the final image.
- Make sure the image is in focus each time before you scan.
- Building a stand like this one to hold the phone can help to improve the definition and consistency of your scans.
Scan your documents
For this example, we will be scanning a page from a book.
Upon opening Adobe Scan, you will be able to select the kind of document being scanned. For this example, rather than the Book setting which enables the scan of two pages at once, we will treat the page as a single document.
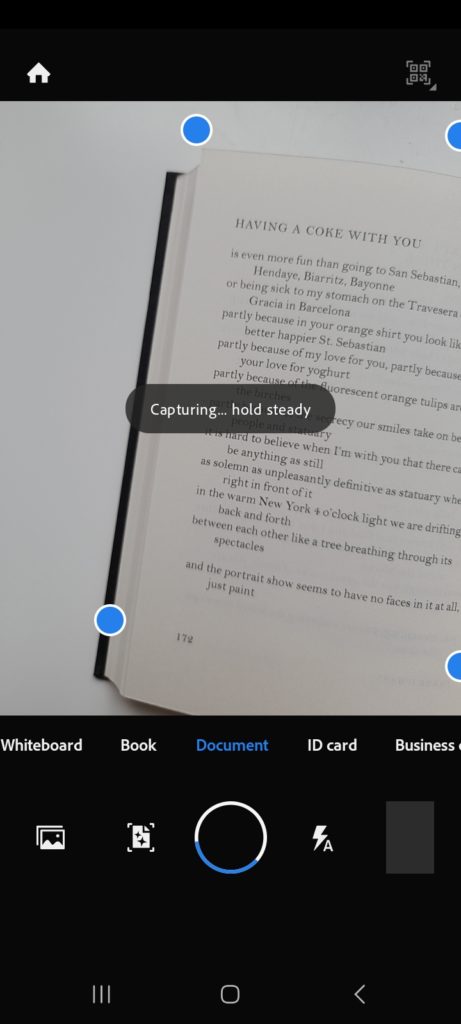
Once the image has been scanned, the app will determine what the borders of your document are. You will have the option to adjust the borders of the crop manually, as this is not always accurate.
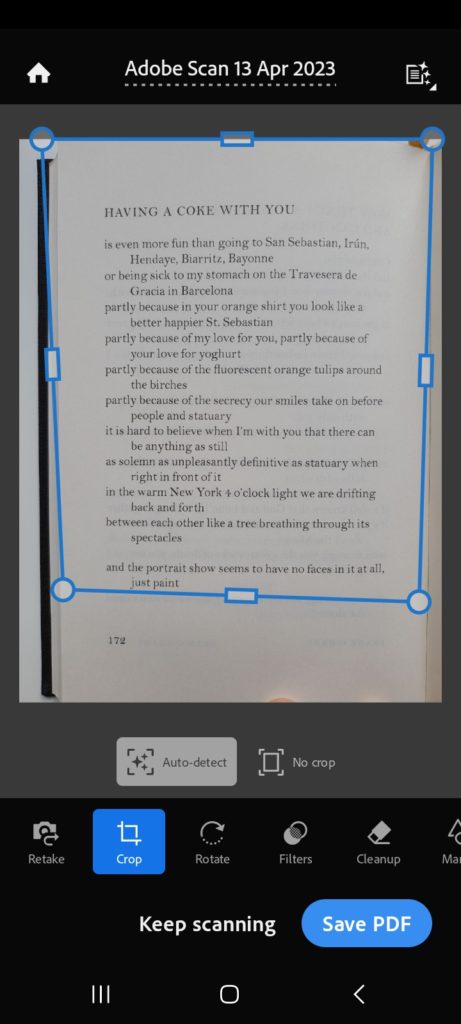
You will also have the chance to adjust other settings using the tools at your disposal.
Once you are satisfied with the way your scan looks, select the “Save PDF” option.
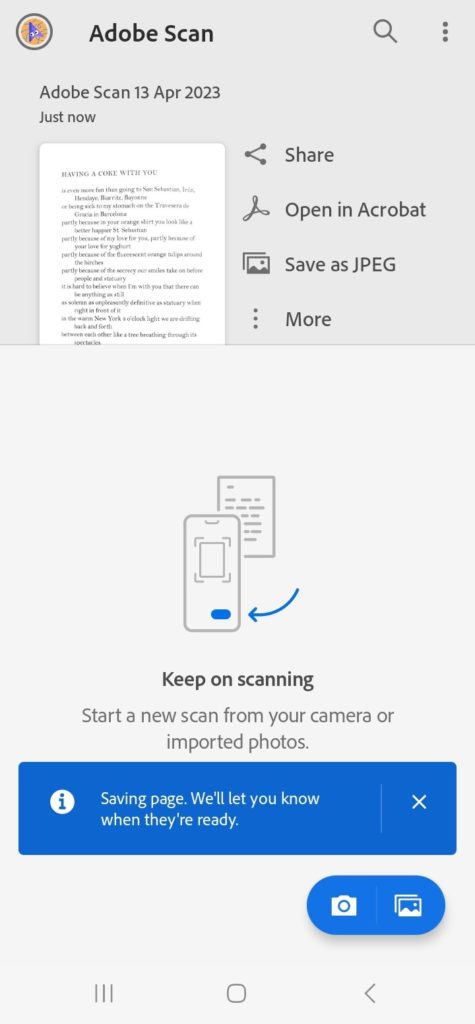
Here you will have the option to share the image, open the PDF in Adobe Acrobat, or save the file as a JPEG. The final product should look something like this:
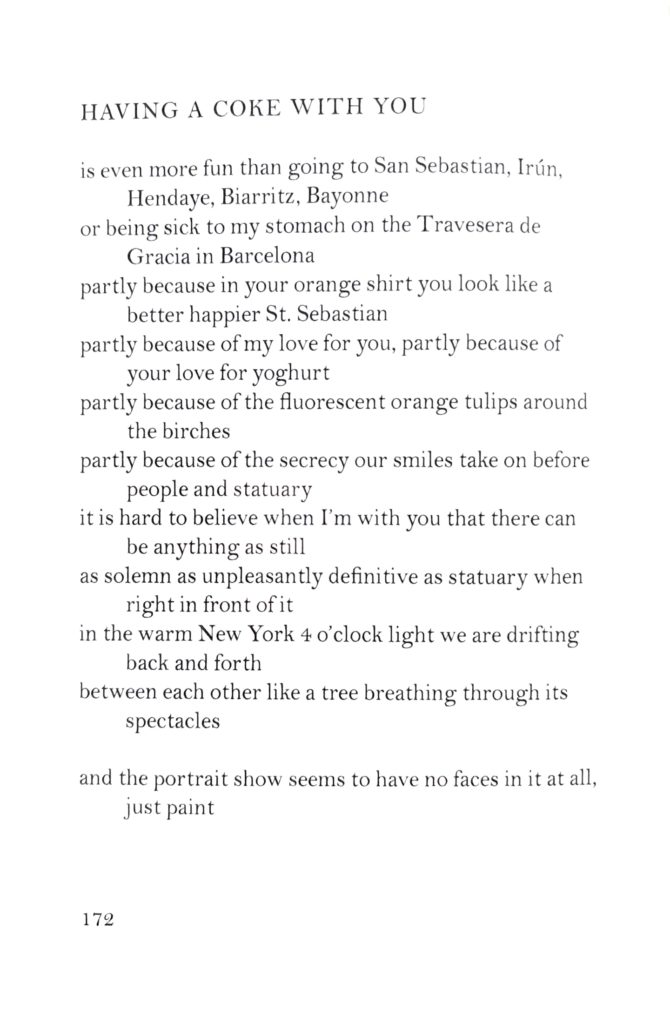
Note that due to the nature of the document as a book, the text may warp unless you are able to lie the page completely flat while also taking the picture. If you do not have a spare pair of hands, you might want to use a paper weight. Alternatively, there are some free scanning apps for mobile phones that have built-in page-curvature correction, such as VoyagerX’s “vFlat Scan – PDF scanner”.
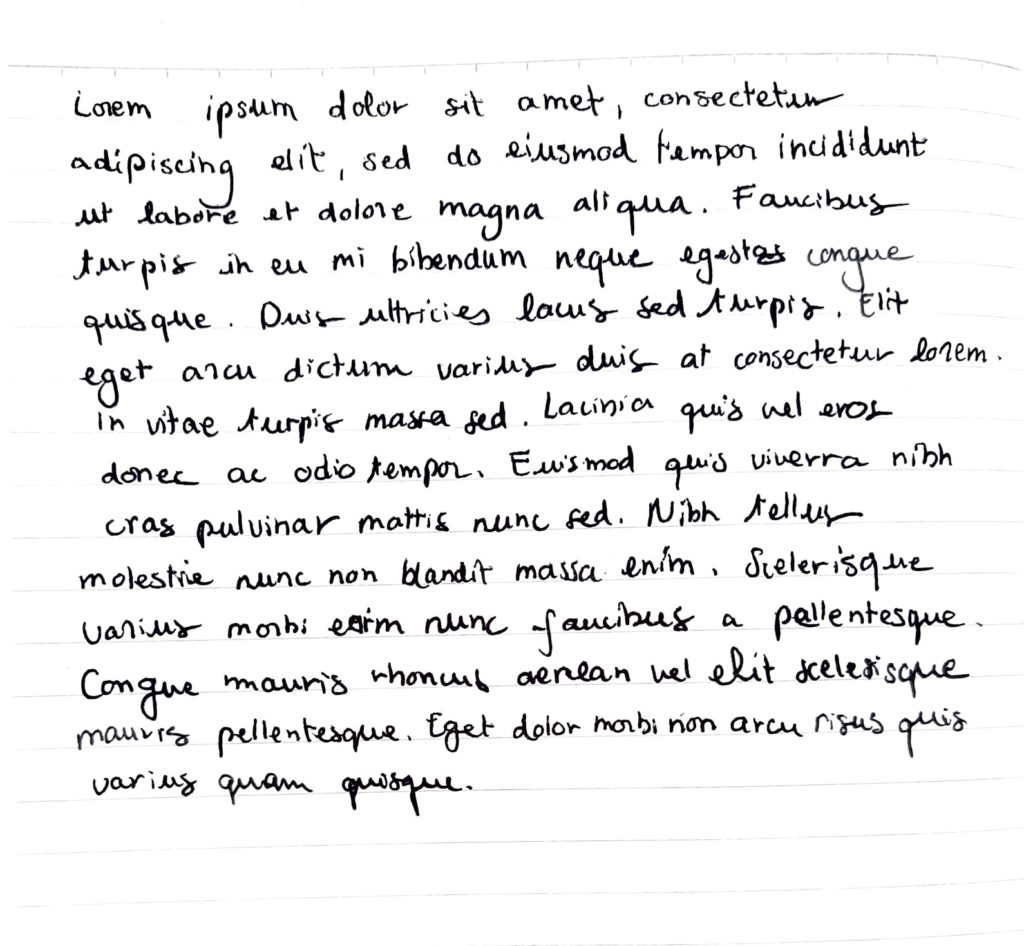
Here is another example of the completed scan of a handwritten document on lined paper:
Other tips
- Certain existing softwares have built-in OCR (Optical Character Recognition). This enables the scanner to recognise the words in the document and create the possibility for in-document word searching. This feature generally works best with printed text rather than handwritten documents.
- Consider producing a transcription if the resulting scan of your documents is an image. These are useful for handwritten documents.
Further resources
UK Data Service, Digitisation.
Digital NZ, Creating Digital Text.
